Introduction
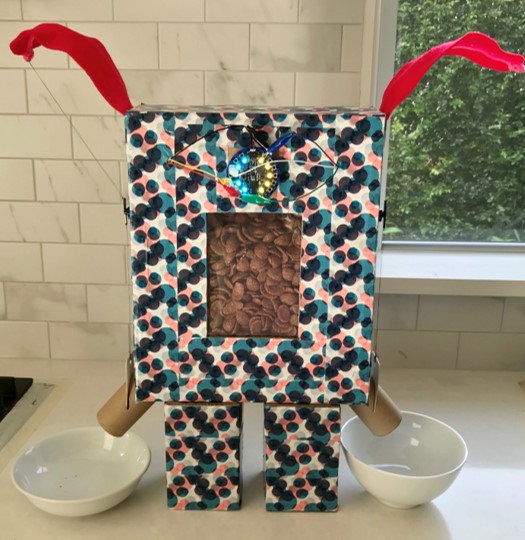
My circuits and coding in Python journey continues in Semester 2 when we have homework in fortnight 3 to build an interface. I was so excited to do this homework when the teaching staff explained it will be a similar exercise to Semester 1 when we had to build a creature using sensors and actuators, only this time we have to build using an interface between the two systems, such as AI-Human, AI-Environment, or AI-AI. I made a cereal dispensing system that can pour customised amount of cereal to your preference and can be personalised with your favourite colour and play tone when you press the button.
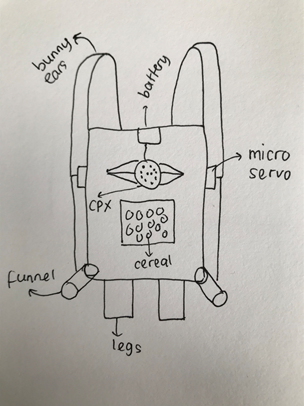
The two systems that I selected were AI-Human (my children) and Human-Food/Biological as well as AI-Environment as I recycled the cereal box by reusing it to create something new and to reduce the waste. The interface: Buttons (D4 & D5) on the Circuit Playground Express and Micro Servo. The inspiration for this interface was mainly my children as we were all stuck in the Sydney lockdown and home schooling. So I was trying to keep my children entertained and involved with my remote study at the same time. The design of this interface was also influenced by my children’s feedback and the Adafruit tutorial for an Automatic Cat Treat Dispenser, and here is the initial sketch.
The Components
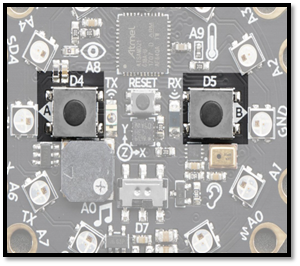
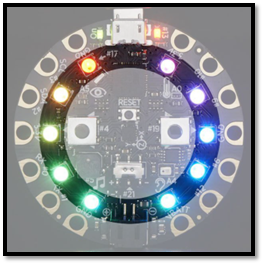
- Circuit Playground Express (CPE) – I selected button A and B so my children can interact with the system and I can assign each button to them individually:
- Button A (D4) = George
- Button B (D5) = Zoe
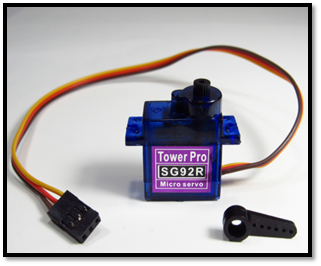
- Two x Micro Servo SG92R, I selected Micro Servo SG92R as the Actuators that can rotate for approximately up to 180 degrees to open the “door” for the cereal to come out from the box. Then -180 degrees to close the “door”. I used 2 for each side for my children (right and left).
- Secondary Actuators = CPE mini speaker and Neopixels. I added the mini speaker to play some tones and music for the sound effects as my kids press the button and waiting for the cereal to come out to make it more interesting. I also added the Neopixels to display some colours LED to display my kids’ favourite colour.

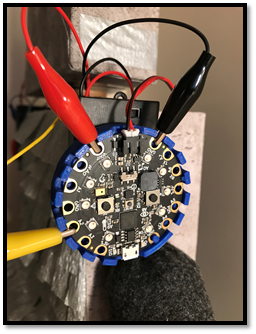
- 6 x jumper wire alligator clips with Male end to connect the Micro Servo and CPE, the ground wires to GND, the power wires to VOUT and the signal wires to A1 for button A (D4) and A2 for button B (D5).
- 4 x AA or AAA batteries (6V) with the battery holder and attachment for CPE
- USB cable for CPE to connect to the computer
- The remaining materials & tools:
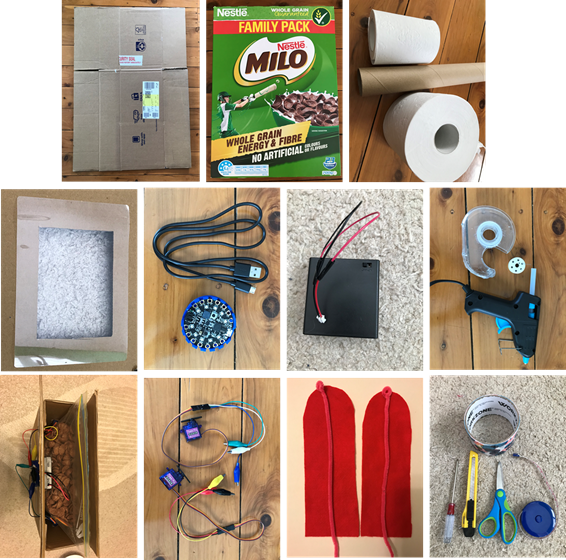
- Any recycled boxes for the body. I used the OfficeWork unused box and MILO cereal box
- Toilet paper or paper towel rolls for the pouring funnel
- Laminating pouch for window
- Tape measure/ruler
- Screw driver
- Cutter and scissors
- Hot glue gun and double sided tape/sticky tape
- String/thread to pull out the “door”
- Pipe cleaner and felt fabric for the ear
- Colourful tape for decoration
- Large zip-lock bag to keep the cereal freshness
The process
- How to make: the box
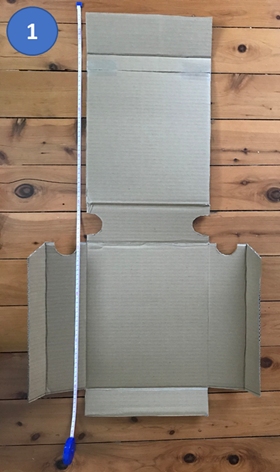
- I measure the outside box to fit in the cereal box originally (33 x 27 x 8 cm) using the template on the left, including half circle on the bottom for both sides for the funnel.
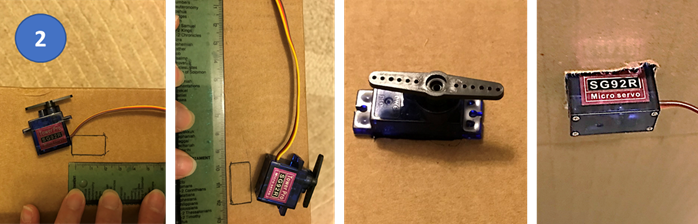
- Then measure the micro servo on both sides, about 10 cm from the top box, and cut the hole with the cutter to fit it firmly, and secure it with hot glue gun, so half part on the outside and the other half on the inside.
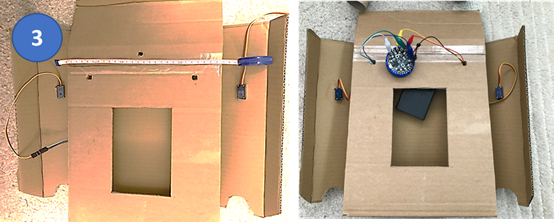
- I make 3 holes on the front box for the cables to connect to the CPX, 2 x 4 cm from both sides and top for the alligator jumper wires from micro servo, and in the middle around 2 cm from the top for the battery cable.
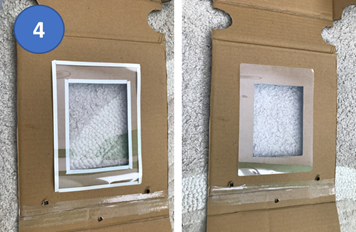
- Make a window to see inside the box with size 10 x 14 cm and I use the A5 laminating pouch to cover this window and secure it with double tape.
- How to make: the pouring funnel and legs
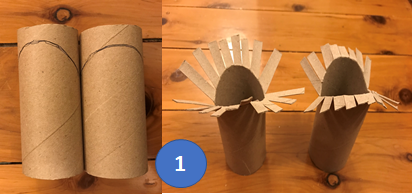
- I use the toilet paper rolls and draw a curve of half circle on both sides for the poring funnel and the cut it vertically about 0.5 cm wide each to fit the size of the double tape.
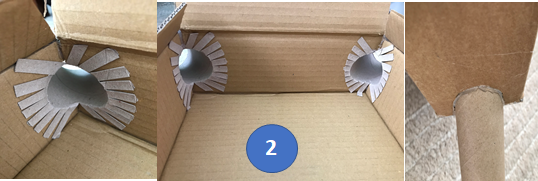
- Peel the double tape and secure the funnels on both bottom corner of the box with hot glue gun.
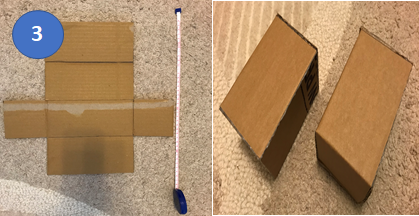
- To make the legs, make 2 x rectangle boxes with measurement 14 x 8 x 8 cm.
- How to make : the “door” and bunny ears
- I cut the funnel about 1cm and 3mm thickness from side of the box (only half way and not all the way down).
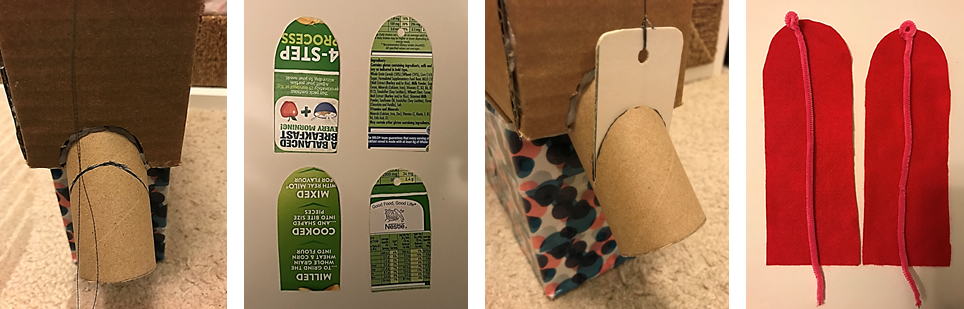
- Then I cut the door with the curve/half circle on one end and measurement around 8 x 4 cm from the cereal box. Need 4 of these doors so you can glue each of the colourful side and make 2 doors in the end.
- Slide down and fit in the door with the funnel and adjust the cut if required to make the door slides smoothly on the funnel. Make a hole on the top of the door and hang it using a string that connected to the micro servo bottom arm.
- Cut the felt fabric to make bunny ears with half circle on one end, measurement around 20 x 8 cm. Add the pipe cleaner in the middle, make a tiny loop on the half circle end and secure it with hot glue gun. Tie a string on the tiny loop to connect with the micro servo top arm.
- Final touch: decorate

Once the box is completed, you can decorate it however you like. I used the colourful tape that my kids selected from ALDI special this week and cover the box with it.
- How to wire and connect the CPE and Micro Servo
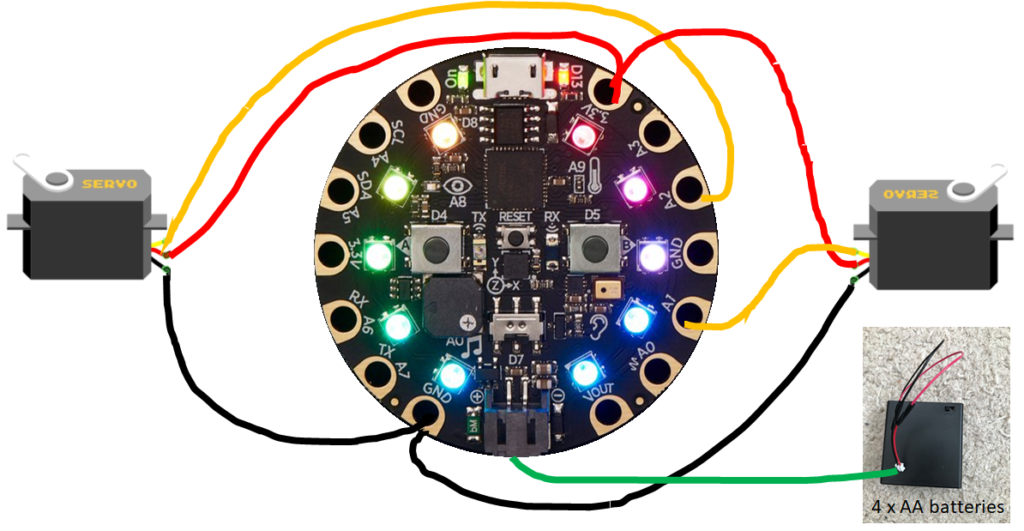
Connect the two BLACK ground wires to the same GND, the two RED power wires to the same VOUT and one YELLOW signal wire to A1 for button A (D4) and the other YELLOW signal wire to A2 for button B (D5).
- The final working system
For the full codes that I used for this interface, click on the photo below.
These are the Adafruit tutorials that inspired my cereal dispenser system, I combined and modified the codes that work with Circuit Python in Mu Editor code. These tutorials are reproducible and can be modified accordingly to suit your project. I modified this code based on the codes listed on the links below:
Reflection
In this homework, I had few challenges in both circuits as well as coding in Python. I managed to overcome those challenges because of the experiences that I had after Semester 1 and especially during my Maker Project. The circuits challenge that I had in completing this homework was the wiring connection between the CPE, Micro Servo and battery. Due to the lockdown in Sydney, I was unable to join the class in person in Canberra therefore no access to the Studio where I can access the electronic tools and equipment such as soldering machine to connect the battery pack and the CPE-battery connector. I only have one battery pack of 4 x AA batteries in my tool kit to power two Micro Servos, and this was tricky given Micro Servo used a lot of power based on my Robot creature experience in Semester 1.
I tried to replicate the connection from my Robot creature by connecting 2 servos into 2 different GND and VOUT/3.3V using only 1 battery pack (instead of 2 in my Robot creature) and unfortunately the CPE didn’t work.
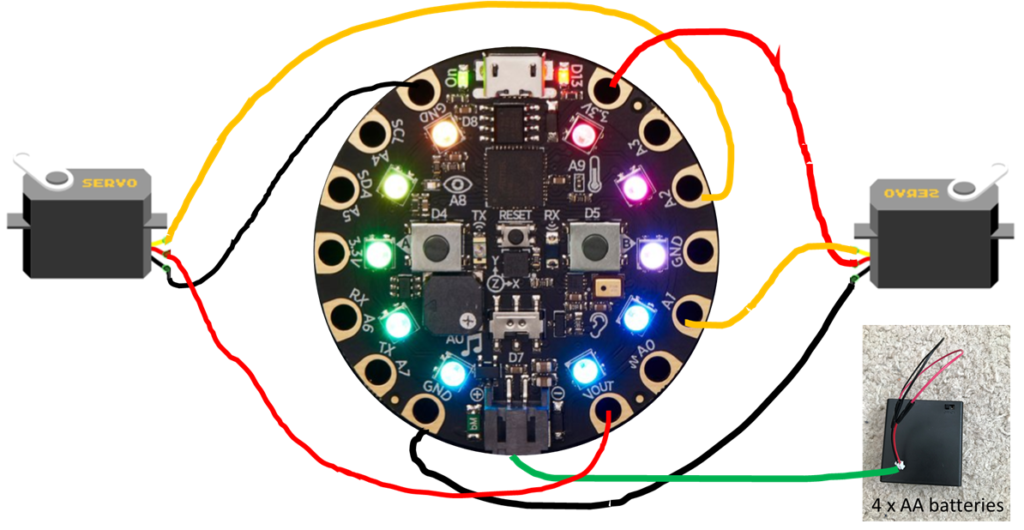
Then I remembered the sewing circuits activity from the very first fortnight where I learned about series and parallel circuits. Also combined with the Maker Project experience when I had to tweak few wiring connection for my Cat RoPot, due to the limited source of power (battery). So, I combined the 2 black wires into one GND connection and 2 red wires into one connection on 3.3V to make a parallel connection given I only have 1 battery pack and 1 CPE for 2 Micro Servos. I was feeling so happy and proud of myself when it worked!
For coding in Python challenge in this interface homework, I used different capabilities (sensor/actuator) in CPE compared to what I used previously in my creature homework. I had to learn how each of the sensor/actuator works, which library that I need to import into the CPE to activate the code. Some of the codes in the Adafruit tutorials were using CRICKIT and I didn’t have one (only CPE) so I had to modify the codes and adjust it for each sensor/actuator so they will work together. Perhaps in future I can make this cereal dispenser system personalised for more than 2 people. I will not use buttons as the interface, but instead other sensor such as voice activated or face recognition which can use the machine learning and use graphical user interface (GUI), or Voice Controlled Interfaces (VUI), etc. to improve my machine learning skills.
Another challenge with the design was the choices for the funnel for 2 children with automatic door to open and close to control the right amount of cereal, and moreover what type of cereal should be used. After few testing and iterations, I was able to set the limit for Micro Servo time sleep to control the amount of the cereal personalised to my children preferences. If I was to repeat this homework, I would use different type of cereal which has more rounded shape and smaller like rice bubbles instead of chunky shapes like MILO, So it can flow better on the funnel when the door is open. Also, I will design the funnel in the bottom centre with declining angle so the cereal can come down better than if the bottom is flat.
From this Interface homework, not only that I enhance and strengthen my technical skill in circuits and coding in Python but it also help me to understand better how the system design and human-AI interaction are important, using the guidelines as the principles. There are few relationships that I can draw from this cereal dispenser system:
- Human – AI = my children interact with the Circuit Playground Express by pressing the buttons and how the neopixel colours light up and play tone.
- AI – AI = when Circuit Playground Express interact with micro servo when the CPX button is pressed and move the micro servo arms.
- AI – environment = I used the recycled cardboard boxes and toilet paper rolls to reduce waste and repurpose the cereal box and create something new and useful.
Connecting this learning to the Practice course where we also learned this fortnight how and what I would change if this interface is to be deployed at scale. Here are some of my thoughts:
- Thinking of systems interactions and interfaces in a bigger scale with more environment consciousness, social interactions and ethical AI in mind.
- Implementing the right combination between the Google People + AI guidebook, Microsoft Human-AI design guidelines, and the Indigenous protocols or any other guidelines suitable for the system’s purpose and user need.
- Thinking of interfaces at different phases in life-cycle and how to decommissioning the system at the end of life-cycle.
Acknowledgement
- Mina for some ideas and making me think the interface system differently based on the Guidelines for Human-AI Interaction.
- My children: George and Zoe for the inspiration and feedbacks on the design
- Chloe for sending me this great article about “The best interface is no interface”, https://www.theverge.com/2015/3/17/8103593/golden-krishna-best-interface-is-no-interface-excerpt